
It did take me longer to write this than it did to sew up the mask. Having to decide or choose which photos to use that would give a clearer instruction on how to sew a mask with a filter pocket, for those who would like to.
This is similar to the DIY Face Mask (CP) v.1 with the exception of how the lining is cut. The lining is used to create a pocket for the user to insert their own filters. The original Face Mask by Craftpassion is a simple 2-ply or 2-layer mask for dust and not for the coronavirus or Covid19 as it is known.
Some have used this version of the face mask as a cover for a surgical mask. Personally, I have found it difficult to insert the surgical mask into the filter pocket simply because it was constructed for a filter not a surgical mask. If you are keen to prolong the lifespan of a regular disposable surgical mask, you will have to have some patience while I do up the printable template off my prototype.
The instructions for this mask is based off the Craftpassion youtube video. I do hope this written/photo instructions will make it easier.
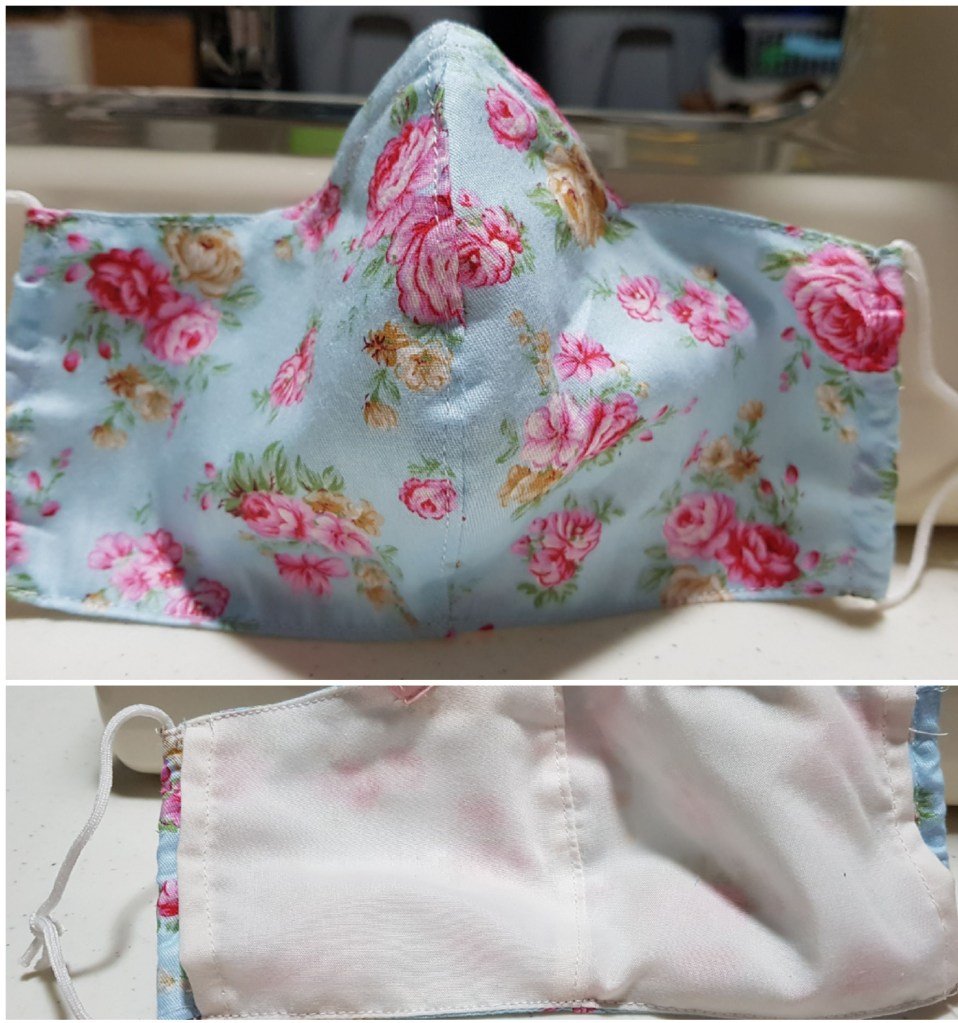
DIY Face mask (CP) with filter pocket
Instructions:
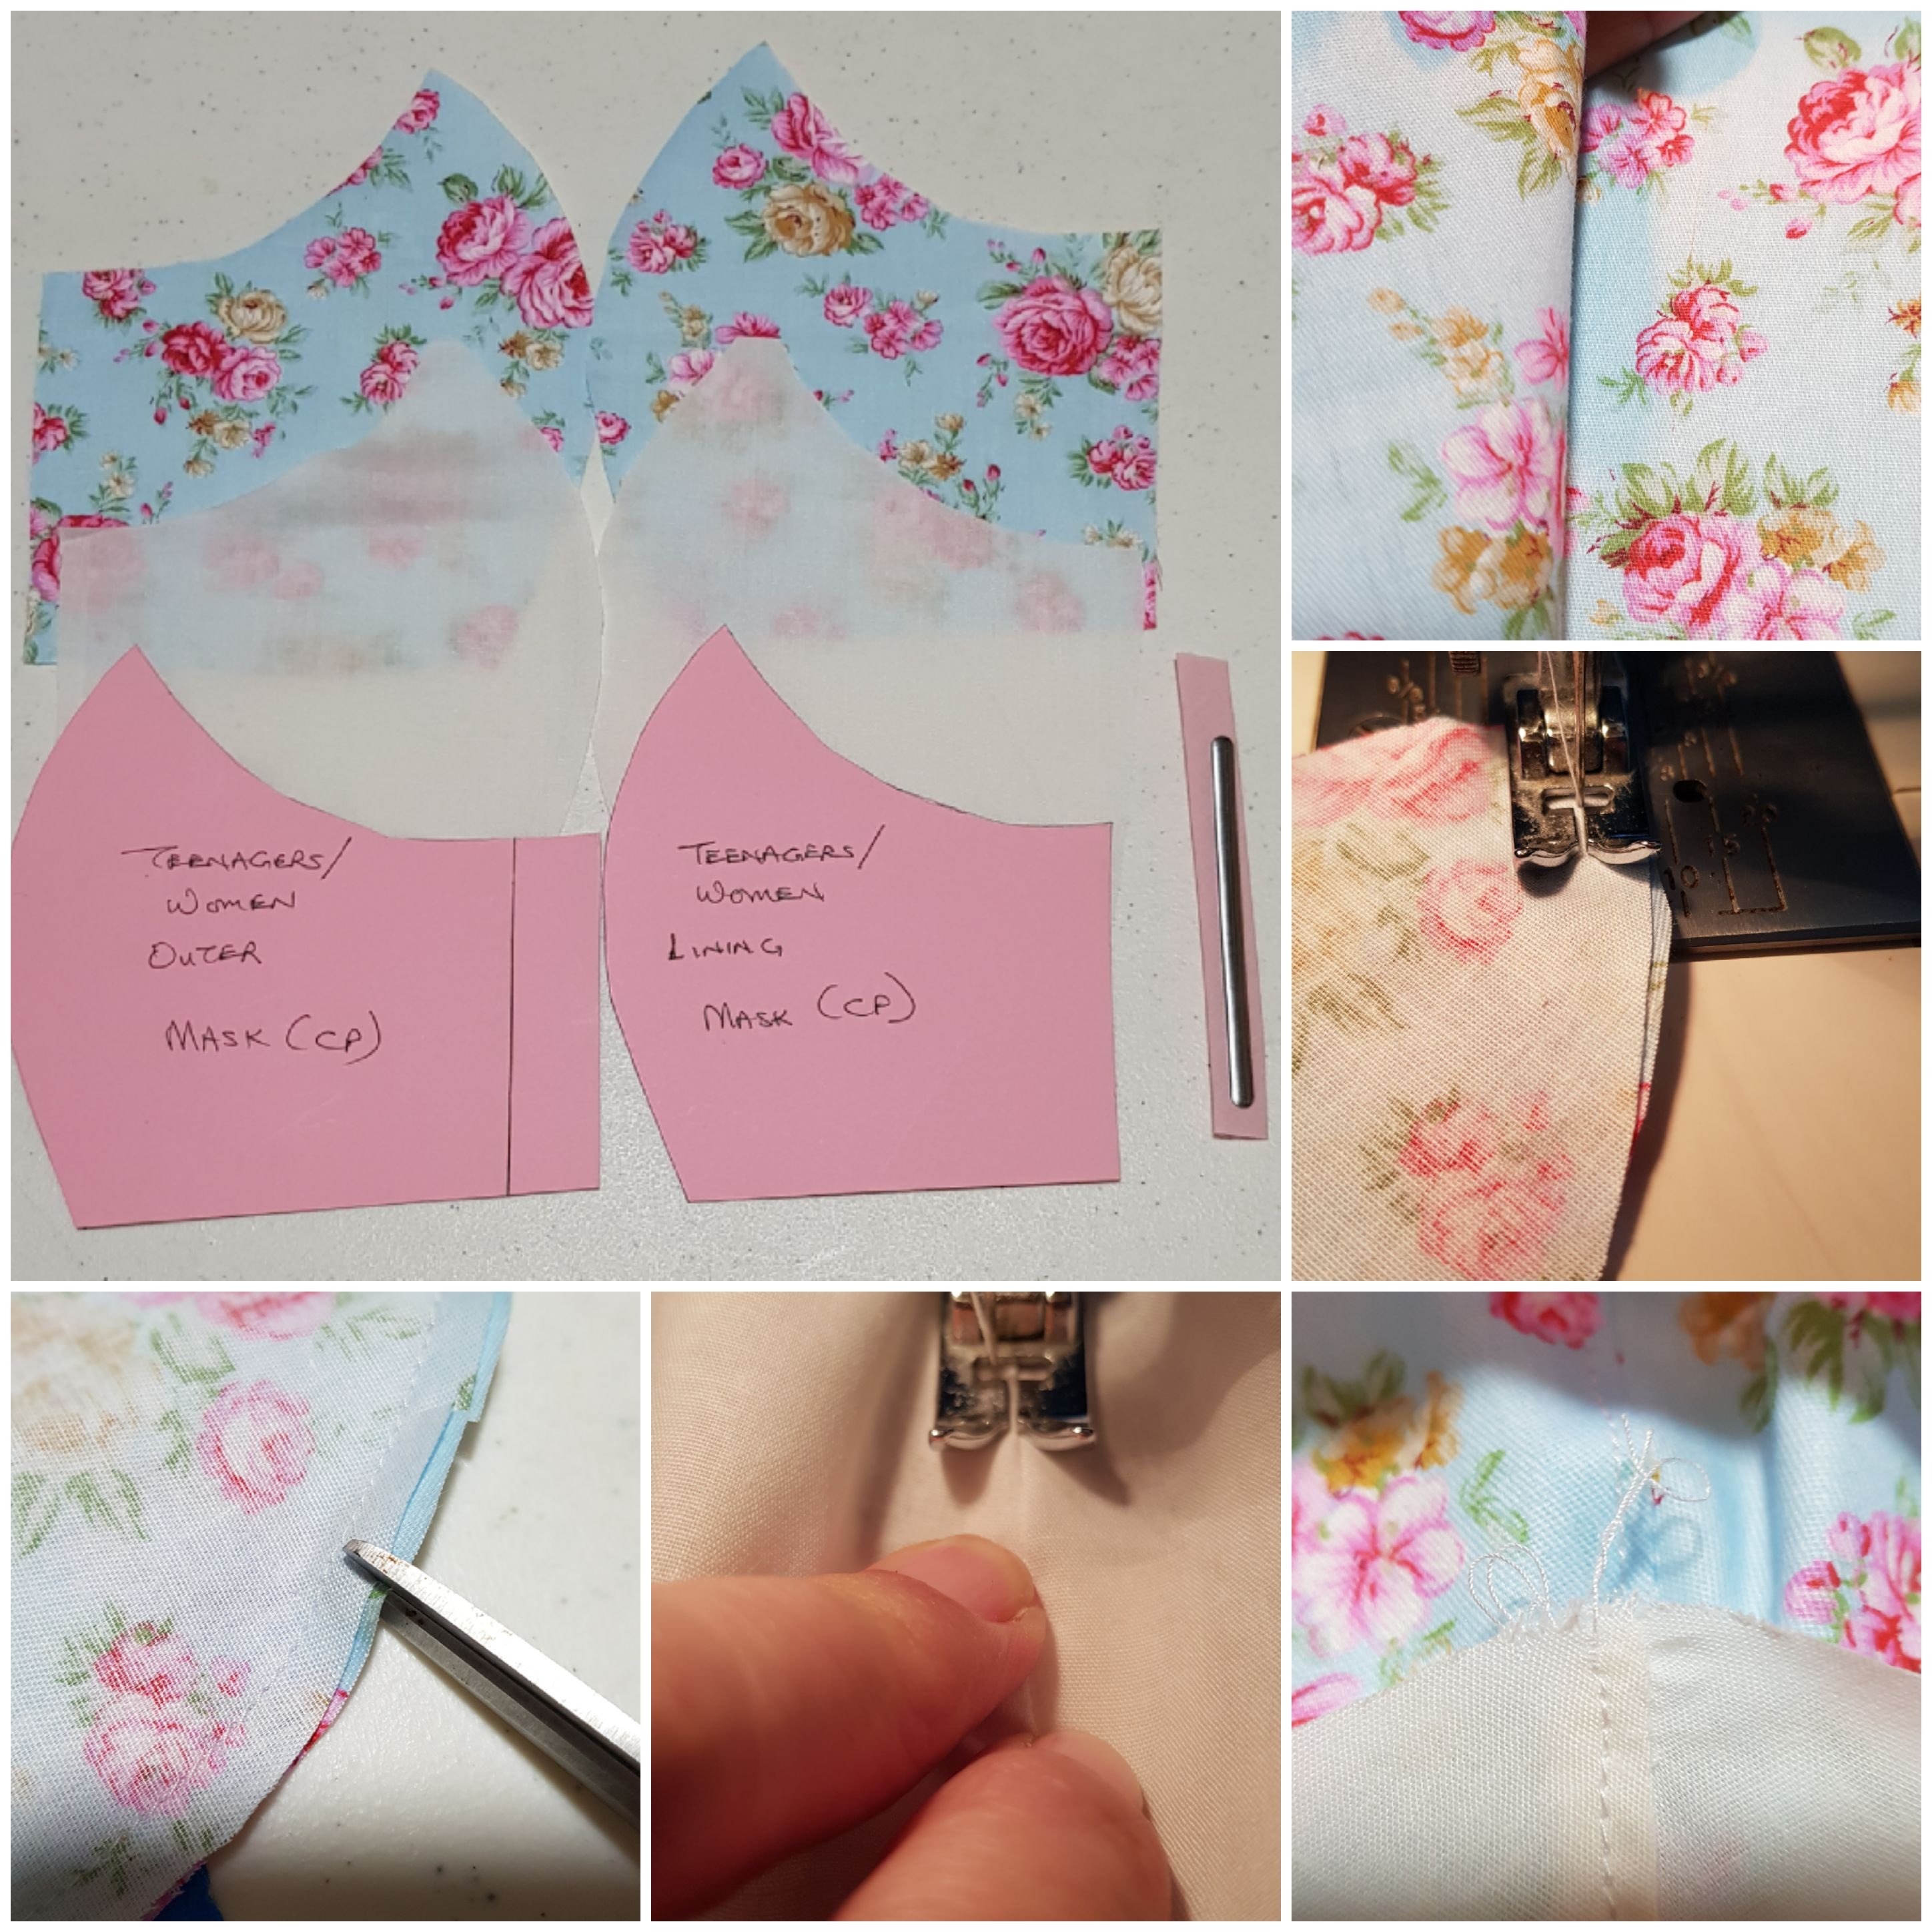
- Cut out the template. Cut 2 pieces each of the outer (main) fabric and the lining (filter).
- Reduce the lining length by about 2cm or 1″ from that of the outer fabric.
- Cut out 4-1/2″ of bias binding
- Sew the outer fabric together along the curve of the mask, making sure that the right sides of the fabric are facing each other.
- Do the same with the lining.
- Notch along the curves of the pieces sewn together, this will allow more give on the fabric when you are turning it out.
- Press open the seams and top stitch on the right side of the fabric.
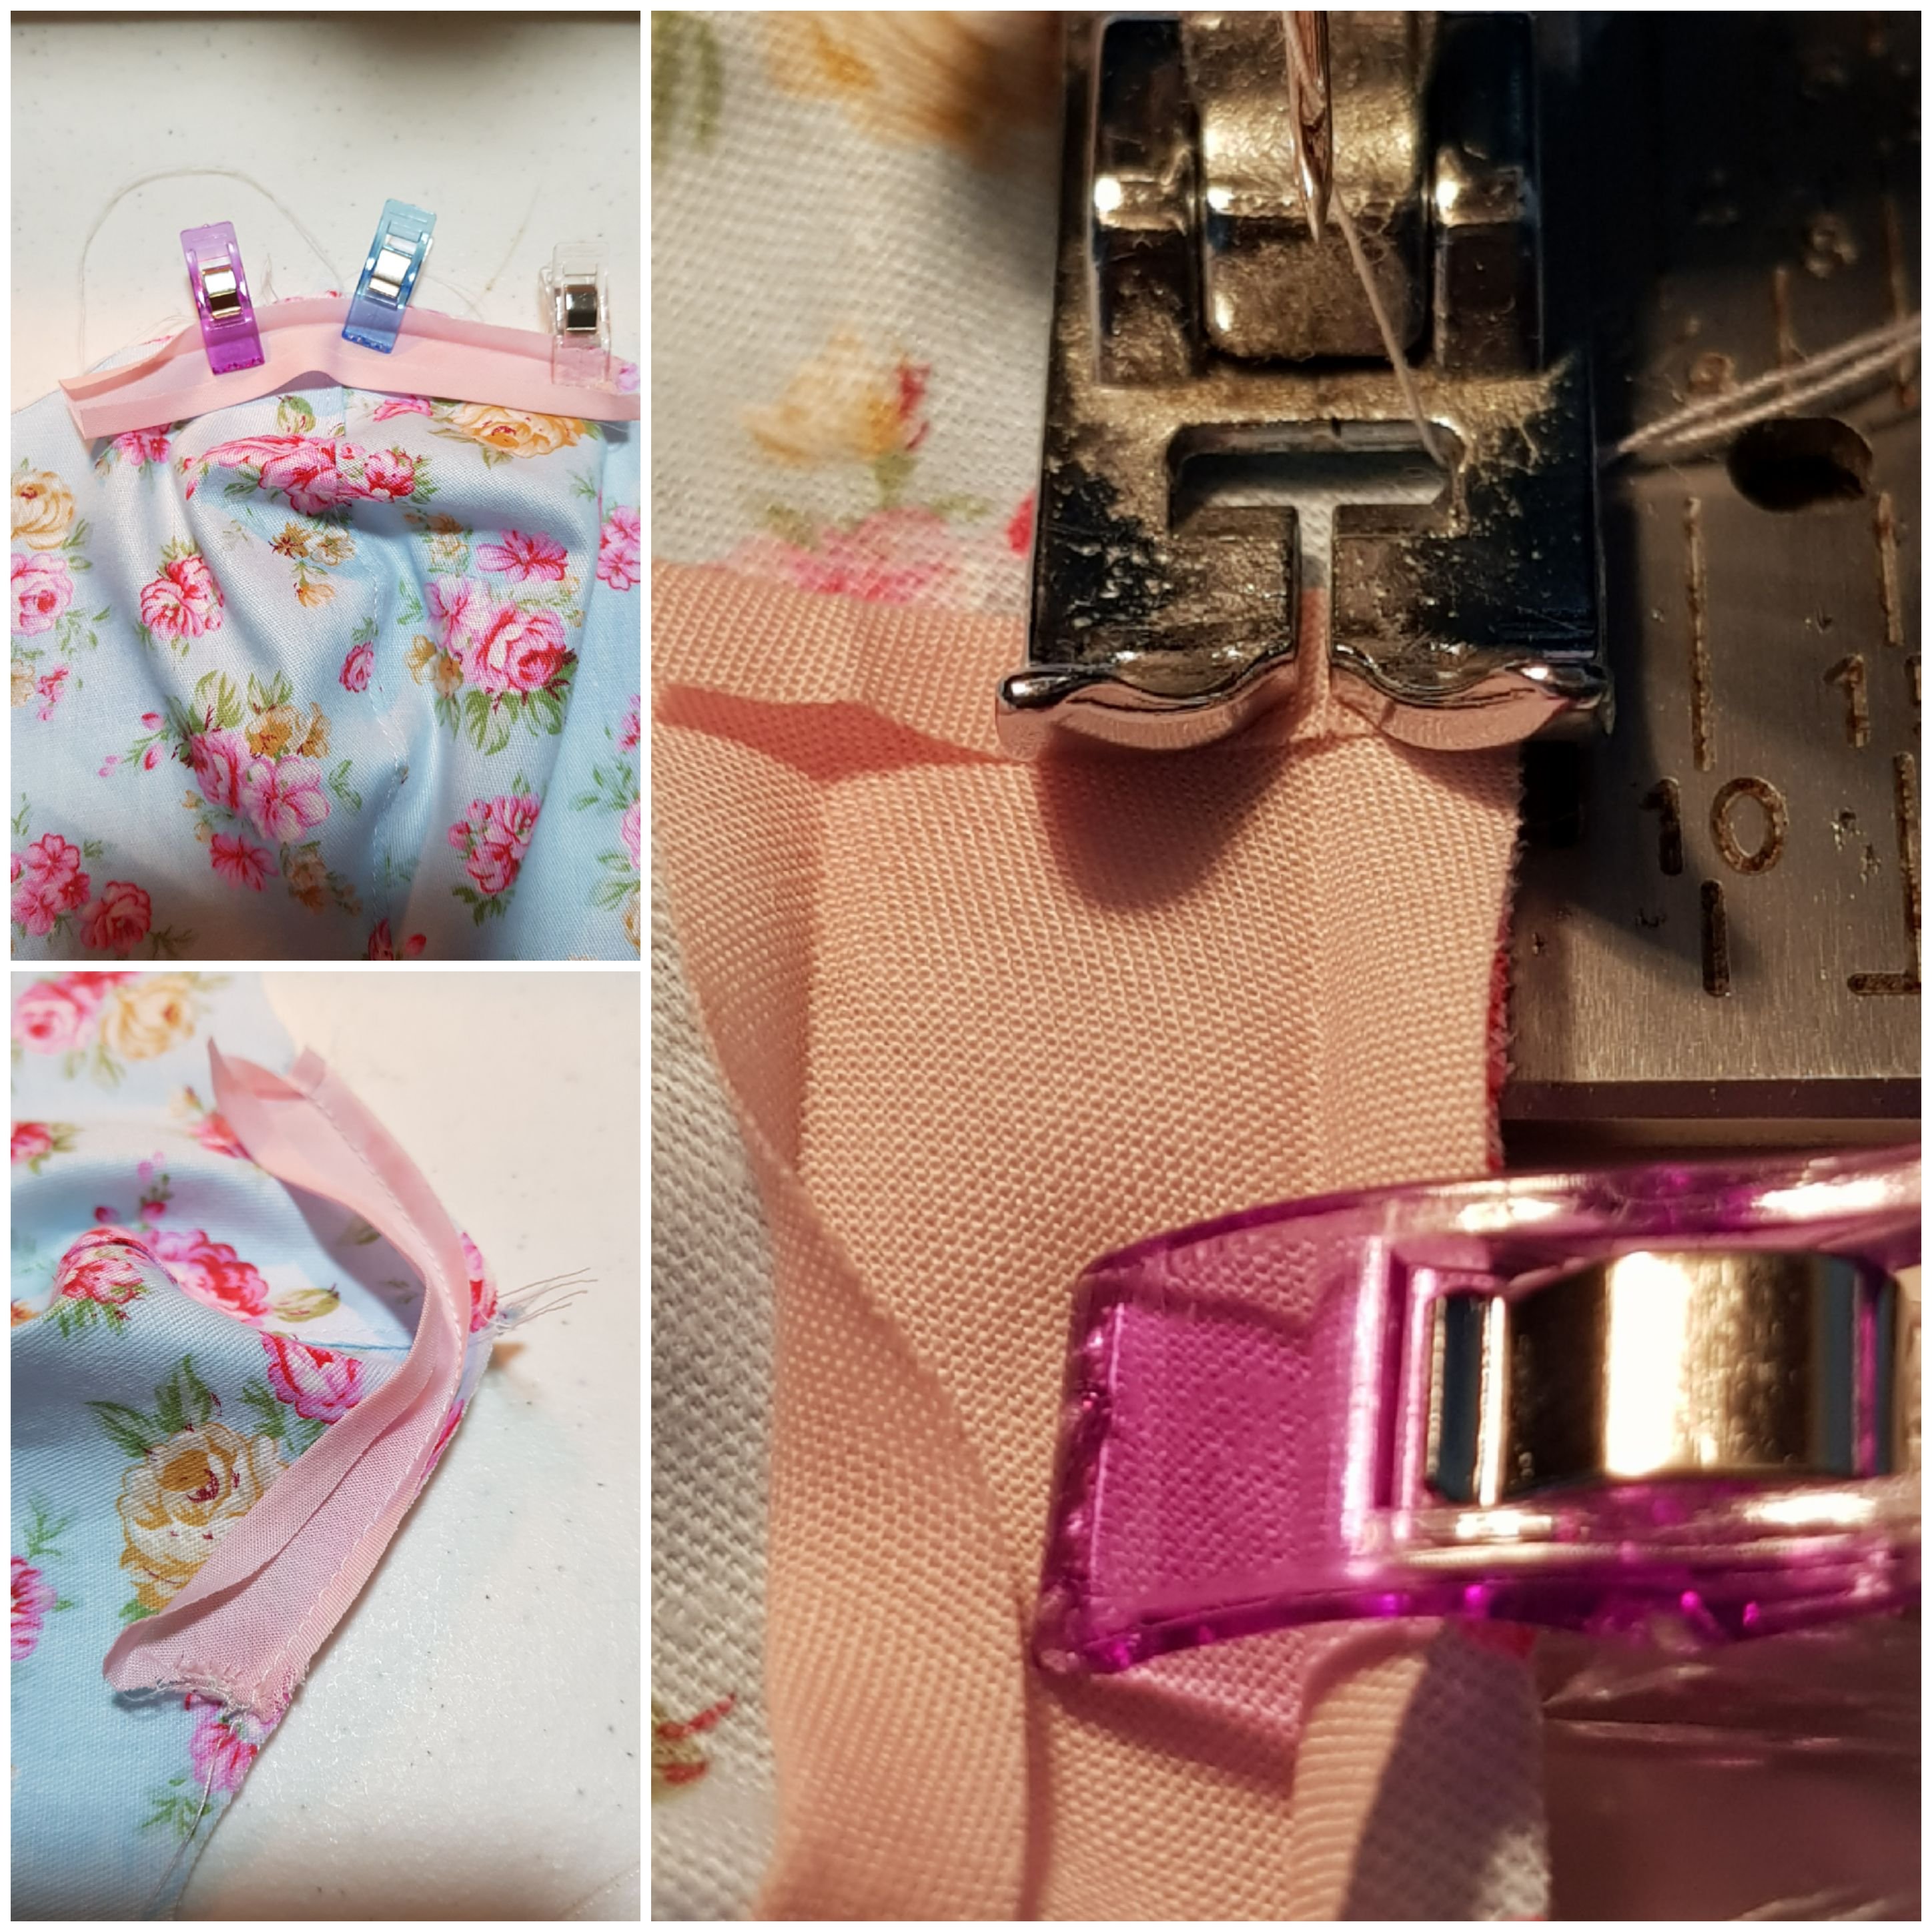
- To sew the bias binding for the removable nose clip. You can either follow the steps on the original video or as above.
- Fold the bias binding in half and place the center of the binding on the seam of the outer fabric as in the photo. Stitch the piece down to hold it in place. You can either sew down the small ends of the bias binding or fold in 1/4″ when you are stitching it down.
- Fold & topstitch the ends of the lining to form the clean edges of the pocket.
- Now, place the right side of the shell & the lining facing each other and top stitch them together.
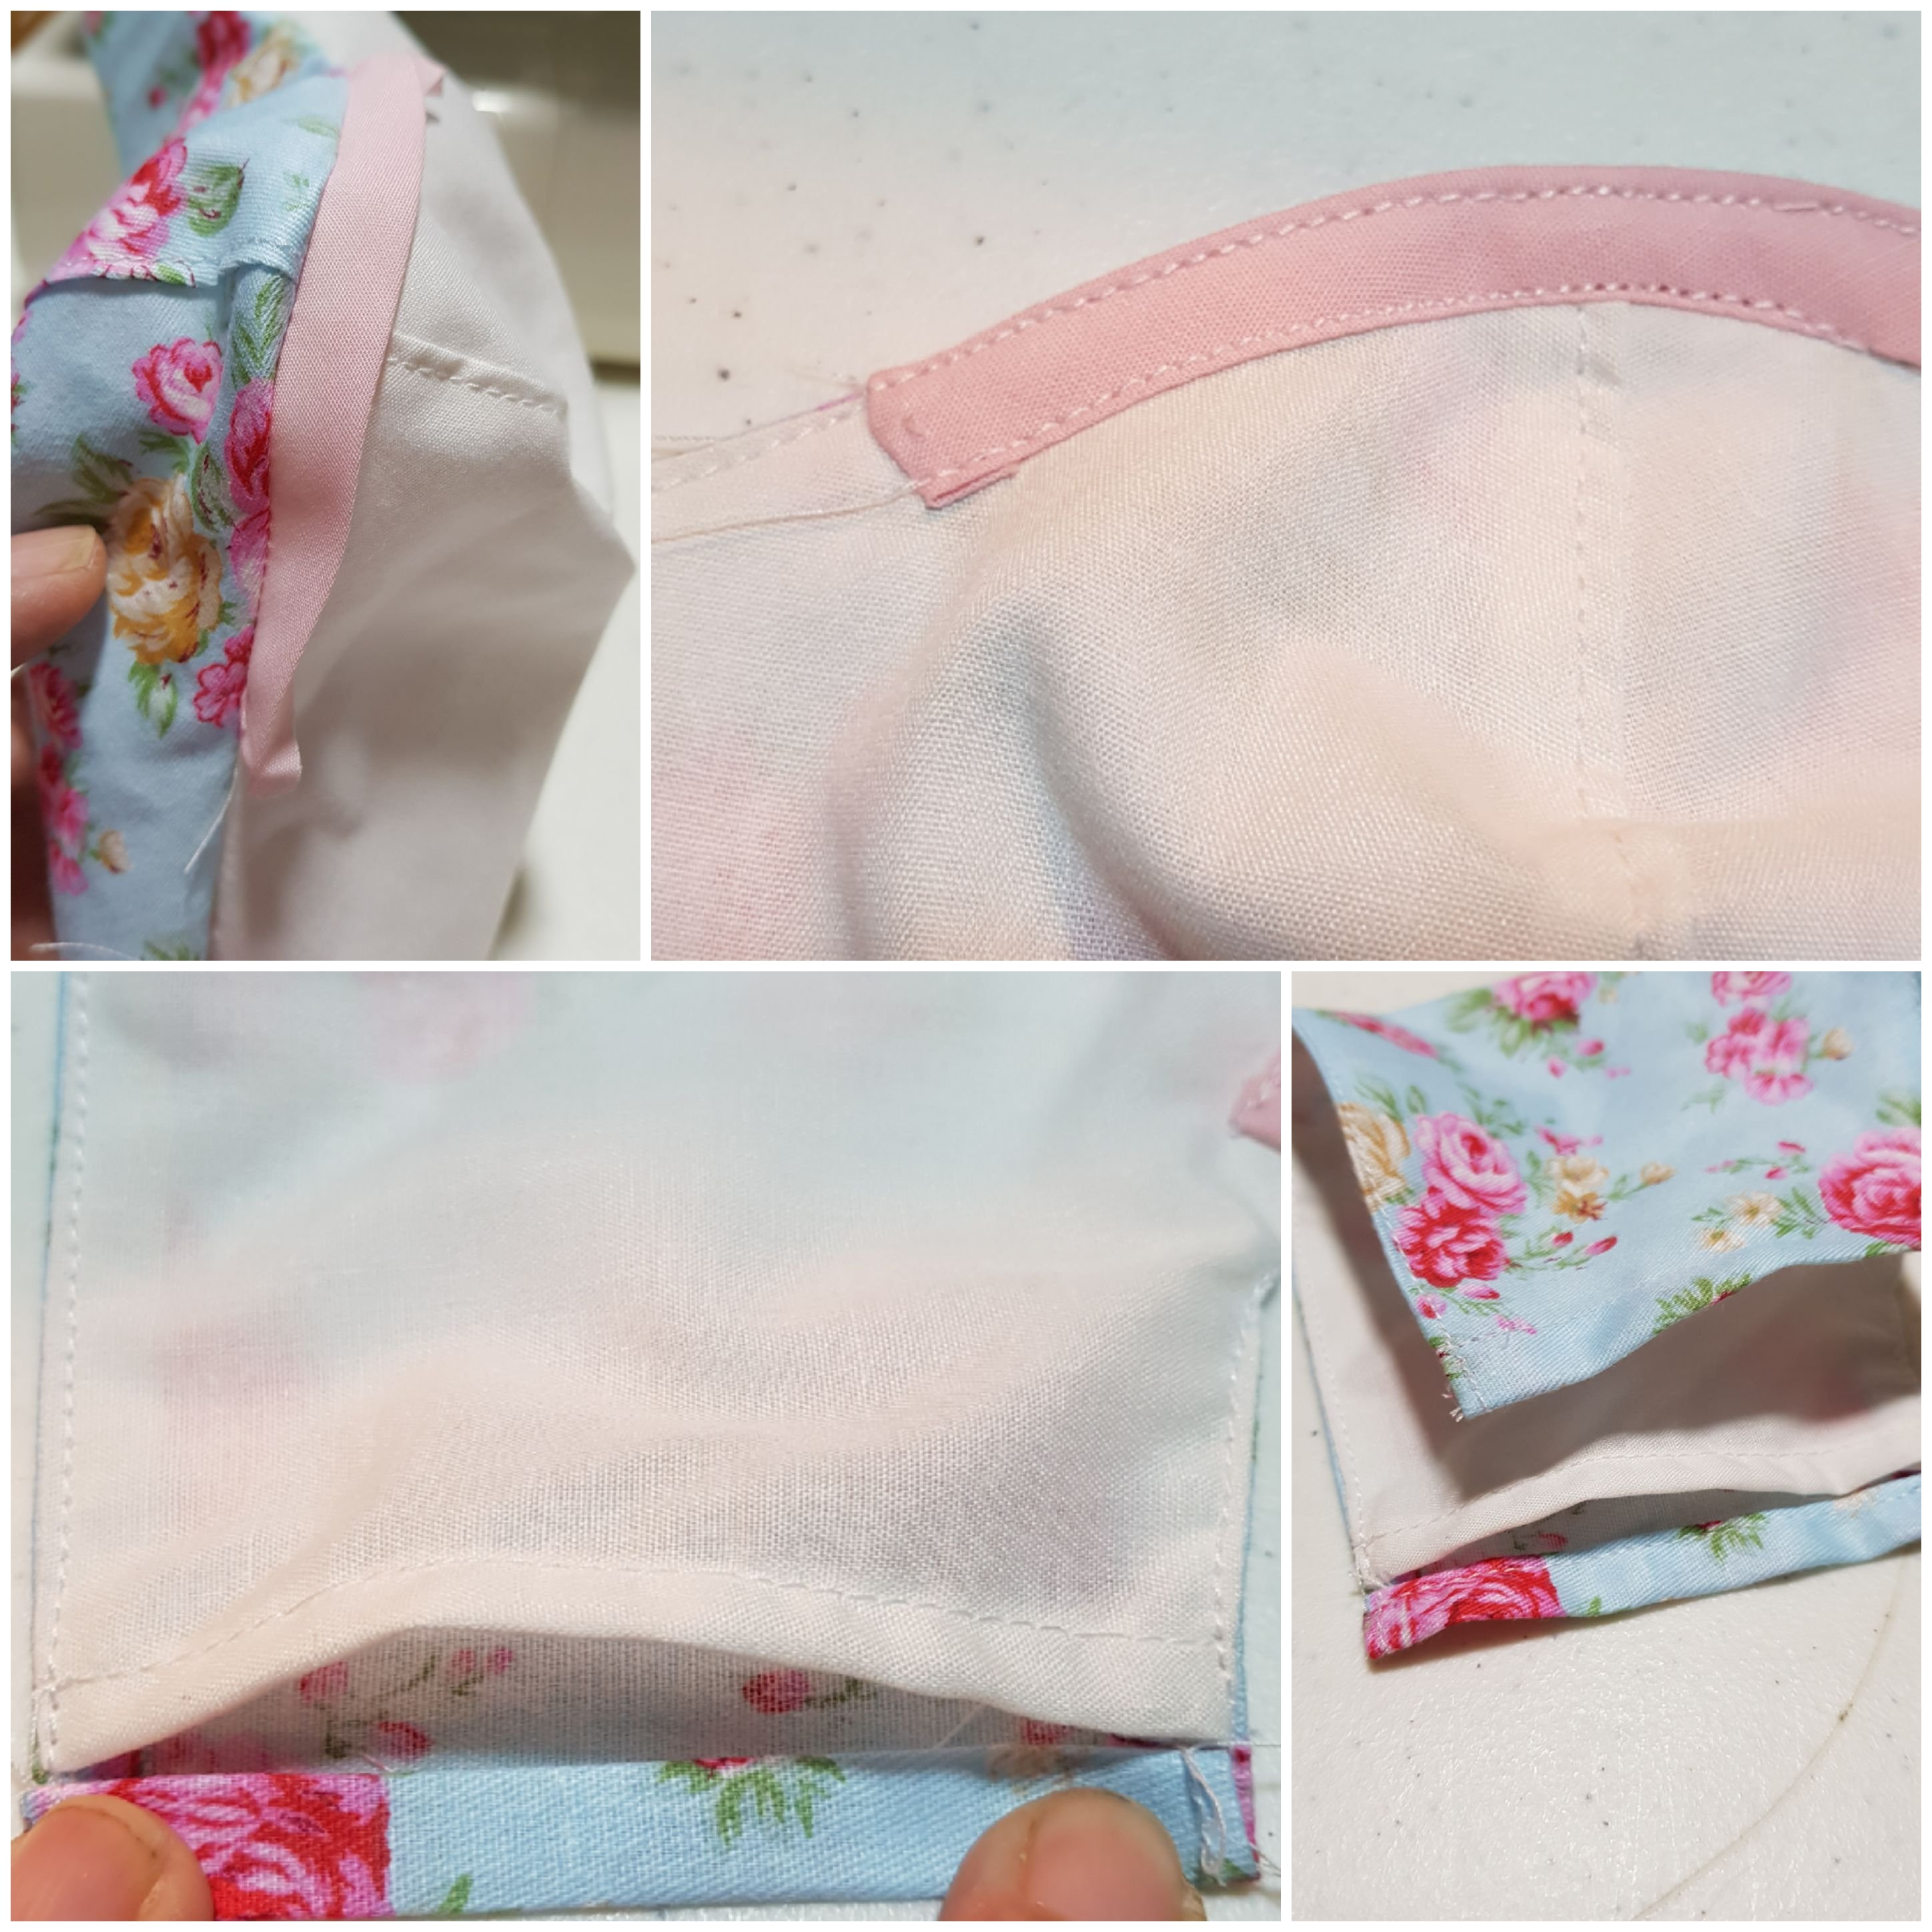
Open up so the shell & lining are like a book. Stitch down the other side of the bias binding onto the lining.
- Flip the pieces again so that the right sides of the shell & lining face each other. Top stitch the other end.
- Turn the mask inside out, so the right sides of the fabric are facing out.
- Edge stitch along both ends of the masks.
- Turn and fold in the ends of the shell fabric & stitch it down as the above photo.
- Add the elastic loops and you are done.

Leave a comment